In these series we frequently highlight new feature releases by SAP Ariba and test them within our internal systems. This time our consultants address a new function within Guided Buying, called Non-PO Invoice, which was part of the 2002 release.
Why Non-PO Invoices?
Sometimes it is easier not to have POs or simply impossible to have a purchase order (PO) for an acquired product or service. Imagine going to a restaurant and having to create a PO before visiting your favorite lunch place. This is, in most situations, not possible. Thus, these costs need to be paid without the existence of a PO after the service is consumed or after the product is ordered.
Implications:
This has several implications for the purchasing process and it means that the entire flow will be different compared to PO-based transactions. Without the existence of a PO it is not possible to perform a PO-flip or have matching done against it for compliance checks. However, sometimes it just cannot be avoided.
Solution:
For these occasions SAP Ariba has the option to create a non-PO invoice. Previously, this was only available in SAP Ariba Buying but now it is also available in Guided Buying. In the 2002 release, SAP Ariba introduced this feature and Brainbox Consulting has tested it. Let us show you how it works!
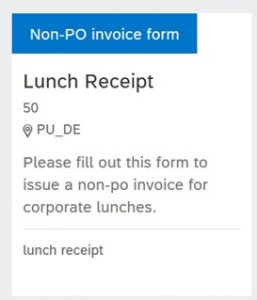
STEP 1: You and your colleagues are having a corporate lunch in the canteen with a couple of potential clients. After lunch you take the receipt and enter Guided Buying on your PC. Within the interface you will see a new tile called: Non-PO Invoice Form. This is a configurable tile that can be assigned to a commodity code and purchasing unit (only with JSON). Additionally, keywords can be added for search capabilities. The form can be customized on the back-end and can contain custom fields.
Requester view:
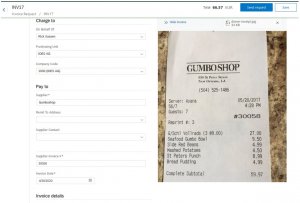
STEP 2: The non-PO invoice form automatically populates the “Charge to” information based on the user profile. The “Pay to” box requires the details from the supplier. What is interesting here is that the supplier does not need to be qualified for a commodity or region. The “Pay to” box will show all suppliers of the organization, also those with no connection to the purchase organization. The “supplier invoice # field” can be automatically populated by ticking the box “auto-generate invoice number” when managing the form from the UI. Additionally, this field can be made read-only by enabling the ‘Application.Invoicing.InputCategoriesFreezeInvoiceNumber’ parameter. The form also allows for adding taxes and perform split accounting across multiple cost centers.
Requester view:
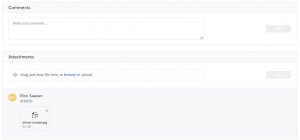
STEP 4: It is possible to leave a message for the supplier. There are two ways to communicate. Either by adding comments in the comment section or by including an attachment. In this scenario a photo of the receipt is added for internal compliance and as reference for the restaurant.
Requester view:
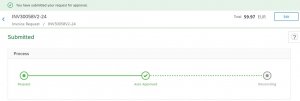
STEP 5: After the non-PO invoice is submitted it will follow the approval flow that is in place in the Ariba system before the invoice goes into reconciliation. The structure depends on the approval flow that is in place. In this case it is auto approved, and the invoice goes straight into reconciliation.
Requester view:
STEP 6: In the reconciliation screen, the AP department is able to handle the reconciliation of the transaction. As displayed on the right, the AP staff member can open the attachment to verify if the receipt matches the actual total amount.
AP staff view:
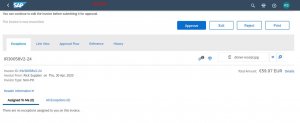
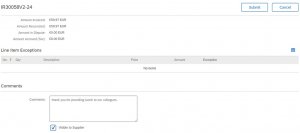
STEP 7: After approving the reconciliation of the document, the invoice is submitted. In this screen the AP staff member has the option to add a comment either for internal purposes or to send a message to the restaurant. From this point the invoice is sent to the vendor (canteen in this scenario) through Ariba Network. So, the restaurant staff know the invoice is coming through.
AP staff view:
Supplier view:
![]()
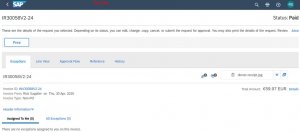
STEP 8: When everything is approved and submitted the document goes into “Paying” status. Depending on the system configuration the payment is handled in the ERP system or in Ariba. When Ariba receives the confirmation of the payment, the status changes into “Paid”.
AP staff view:

STEP 9: The final stage is the “Paid status”. This will also be sent across the Ariba Network, so the vendor (canteen in this scenario) is able to see the payment process is completed. All involved stakeholders in the transaction are updated on the status as seen below:
AP staff view:
Requester view:

Supplier view:

The feature is very user friendly and can be easily configured once the parameter has been enabled. There are several business cases that will benefit from the option of non-POs within Guided Buying. The main benefit is that by enabling this feature, all users will have intuitive access to non-POs without having to switch to the Ariba Buying interface.
At Brainbox we follow new releases by SAP Ariba closely and we test each one of them thoroughly. This way of working enables us to implement the newest innovations at our customers. Our consultants are available for implementing new features and we can apply changes to existing SAP Ariba configurations. For more information on our expertise, visit Brainbox Consulting Services or contact us at sales@brainbox.consulting.


